Update Bucket AV
Introduction
Bucket AV is installed in the File Services accounts and provides a Clean/Dirty bucket setup. Files uploaded into the dirty bucket and are scanned, cleaned and move into the same place in the clean bucket. The Bucket AV software requires regular updating to remove possible vulnerabilities.
Procedure
To update Bucket AV, follow these steps:
Dev, Test and Stage accounts
Updates must be tested in non production environments before deploying into production.
-
Clone the Bucket AV infrastructure repository from https://gitlab.com/nhsbsa/ddat/file-services/bucket-av/terraform/bucket-av-infrastructure and take a branch.
-
In the cloudformation.tf file the following CloudFormation stack files may need to be updated. You will need to replace the template_url on each one for the latest one. Comment out the existing template_url before adding the new one in case you need to roll back:
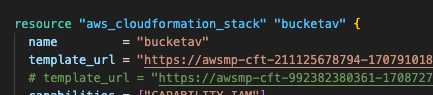


- New template_url's can be found @
| CF Stack | URL Location |
|---|---|
| bucketav | bucketav_update |
| bucketav_add_on_move_clean | bucketav_add_on_move_clean |
| bucketav_add_on_scheduled_bucket_scan | bucketav_add_on_scheduled_bucket_scan |
| bucketav_add_on_security_hub | bucketav_add_on_security_hub |
| bucketav_add_on_ops_center | bucketav_add_on_ops_center |
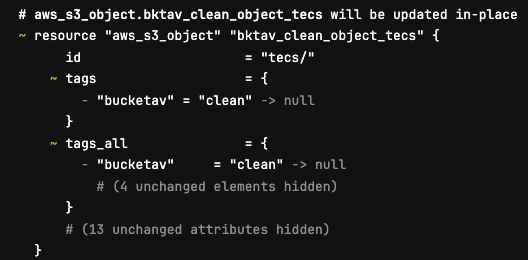
- Once the necessary template_url's have been updated ensure your .gitlab-ci.yml file only points at dev, test and stage. Commit your branch and deploy the resources into dev initially. In your build job you will see a number of jobs looking like below. This is expected behaviour and you can ignore these.
- Once deployed into dev check the system works by uploading a file into the dirty bucket. If BucketAV is still working the file will be moved into the clean bucket. Remove the file from the clean bucket.
Production
-
Instigate a standard change under the title:
-
Switch your .gitlab.ci-yml file to point at prod only and run your pipeline. Once happy of the changes that will be made create a MR and merge into main.
-
Double check the changes about to be made and once you are happy run your deploy job.
Rolling back
- If the system is not working post deployment then you can rollback by reverting your changes and using the previous templates.