Process for creating new accounts in AWS
Introduction
This document covers the end-to-end process for creating new accounts in BSA Cloud AWS. Work through the steps in order, as each step builds on the previous one.
Step 1 — Account customisations (AFT)
Introduction
This step creates the account customisations that AFT uses during account creation.
Procedure
- Clone the GitLab repo and copy the "1 Template" folder, renaming it to match the name of the account you are creating. In the project's terraform directory, update the following files where applicable:
aft-providers.jinja
Add the Service line, Service, and Department tags.
iam-role.tf
Set trusted_role_arns to the name of the runner to be used.
terraform.tfvars
Set vpc_name.
- Commit the new account-customizations file to GitLab.
Step 2 — Account requests (AFT)
Introduction
This step creates the account request that AFT uses during account creation.
Procedure
-
Clone the GitLab repo https://gitlab.com/nhsbsa/nhsbsa-cloud/aft/terraform-aft-account-request and navigate to the terraform directory.
-
Copy
template.tf.oldand rename it with the name of the account you are creating. Update the file with the project details:
module "TDS-Business-Rules-Dev" {
  source = "./modules/aft-account-request"

  control_tower_parameters = {
    AccountEmail              = "aws-accounts-business-rules-dev@nhsbsa.nhs.uk"
    AccountName               = "TDS-Business-Rules-Dev"
    ManagedOrganizationalUnit = "Workload Non Prod (ou-1mrk-0j481d8o)"
    SSOUserEmail              = "null.null@null.null"
    SSOUserFirstName          = "null"
    SSOUserLastName           = "null"
  }

  account_tags = {
    "Department"   = "primary-care-services"
    "Service-Line" = "Dental"
    "Service"      = "Dental Services Portal"
  }

  change_management_parameters = {
    change_requested_by = "Kinjal Amin"
    change_reason       = "Added account for Business-Rules Dev"
  }

  custom_fields = {
    ipam_pool      = "eu-west-2/devworkload"
    ipam_pool_name = "dev-workload"
    vpc_netmask    = 22
  }

  account_customizations_name = "Business-Rules"
}
-
Change the module name to reflect the account being created. Names should start with a code for the overall service, for example
TDS. -
The
AccountEmailvalue must be unique across all accounts. Use the formataws-accounts-[account]-[environment]@nhsbsa.nhs.uk, for exampleaws-accounts-plc-dev@nhsbsa.nhs.uk. Raise a request with the infrastructure team to create the new email alias. -
AccountNamemust contain only letters, numbers, periods, dashes, and underscores, and must begin with a letter or number. Do not use spaces. -
ManagedOrganizationalUnitmust reference an existing OU. If no OU exists the account creation will fail. The standard options are:
ManagedOrganizationalUnit = "Workload Non Prod (ou-1mrk-0j481d8o)"
ManagedOrganizationalUnit = "Workload Prod (ou-1mrk-qoecubq4)"
-
Update
account_tagsto reflect the service, department, and service area. -
Update
change_management_parameterswith the name of the person requesting the change and the reason. -
Update
custom_fieldswith the IPAM pool and netmask for the accounts. The IPAM pool format is[region]/[environment][workload], for exampleeu-west-2/devworkload. -
Set
account_customizations_nameto match the account customisations created in step 1. -
Repeat for each environment required, for example dev, test, sit, uat, stage, and prod.
-
Commit the new account request file to GitLab. This triggers the AFT pipeline, which creates the account in the specified OU with the specified customisations. Monitor progress in the AFT pipeline and the AWS Control Tower console.
Step 3 — Assigning SSO permissions
Introduction
This step adds SSO permissions to the new accounts.
Procedure
Before creating SSO permissions, raise a service request with the infrastructure team to create the following AD groups. Make clear in your request that these groups need linking to the AWS BSA Cloud prod application in Azure AD:
- aws-service-architects
- aws-service-architects-offshore
- aws-service-delivery-manager
- aws-service-developers
- aws-service-testers
- aws-service-platform
- aws-service-platform-offshore
Add Platform Engineers to either aws-platform or aws-platform-offshore, depending on where they are based. This gives them read-only access to non-prod accounts (offshore) or to all accounts (onshore), which supports collaboration and makes it easier to move staff between teams.
Clone the GitLab SSO repo, make the required changes, and create a branch. In your new branch:
account-assignments.tf
- Copy an existing block and paste it in the correct alphabetical position for your new service. Update the module name and the source name to reflect your service.
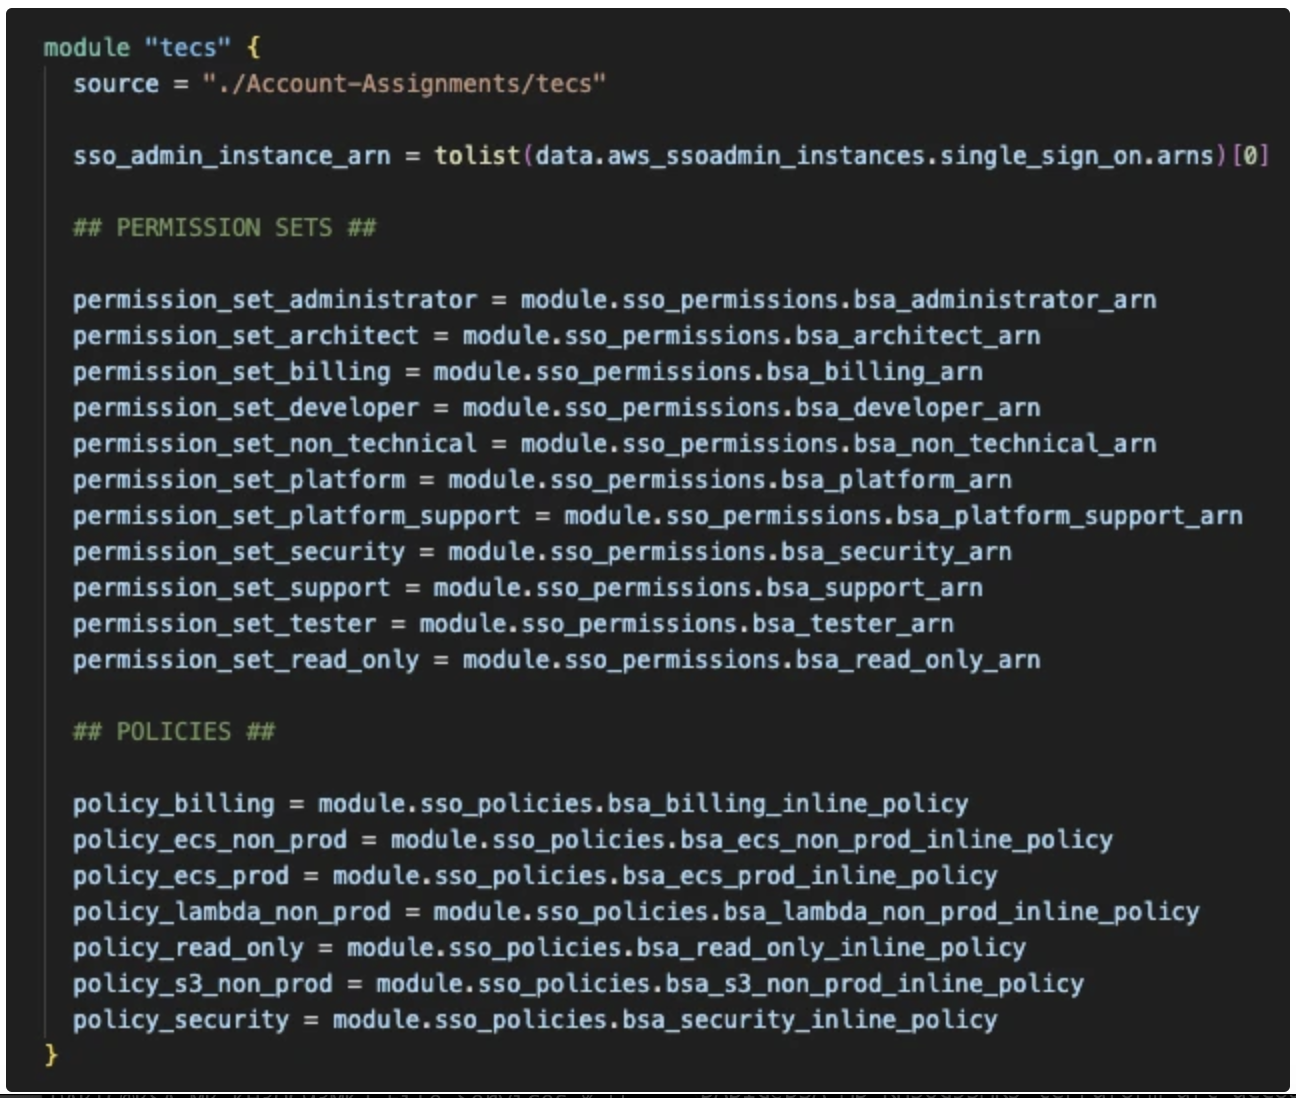
Account Assignments folder
The folder contains three template folders:
- 01 normal template
- 02 additional permissions standard template
-
03 additional permissions complete template
-
Copy the
01 normal templatefolder and rename it with the name of your service (matching the name used in the AWS account). -
Open
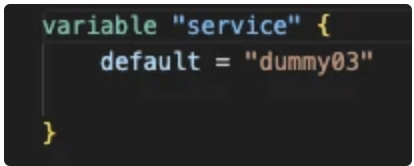
variables.tfin the new folder and update the following:
service — change to the name of the new service.
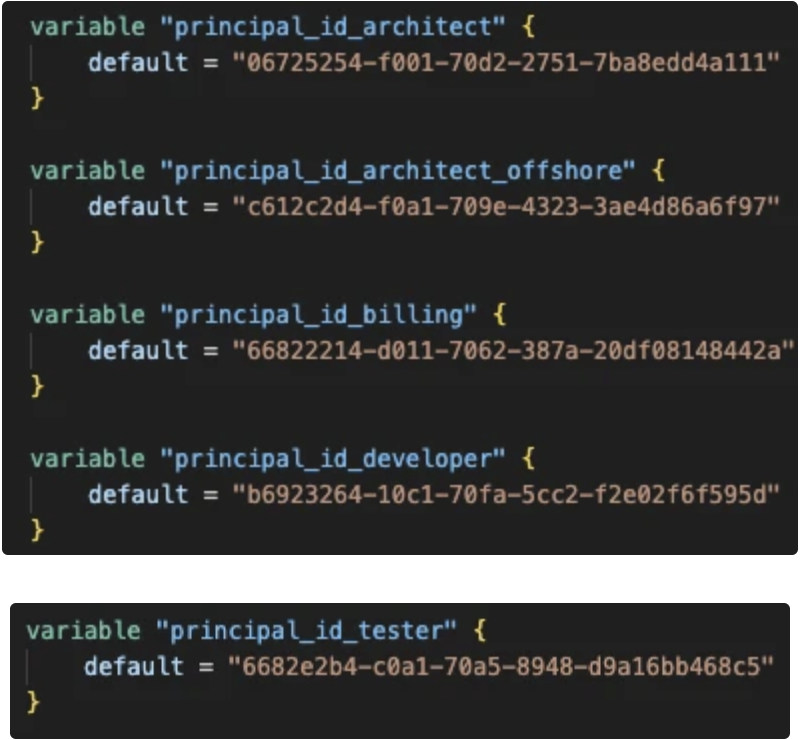
Principals — change the following group values to match the actual groups in IAM Identity Centre in the SSO account:
- architect
- architect_offshore
- billing
- developer
- delivery_manager
- platform
- platform_offshore
- tester
Accounts — update the account variables with the correct values. Remove any that are not needed.
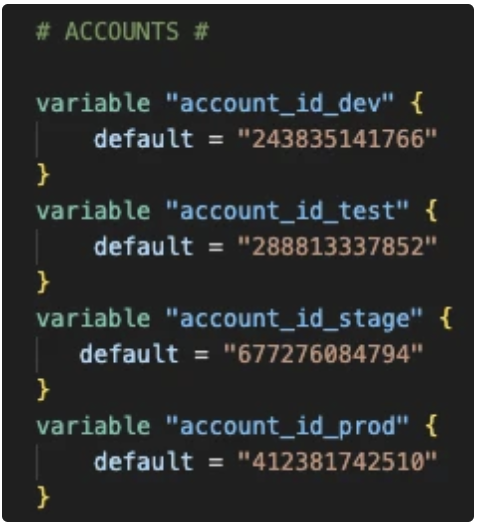
- If you do not have the standard four accounts (dev, test, stage, prod), remove the unused ones from
locals.tf:
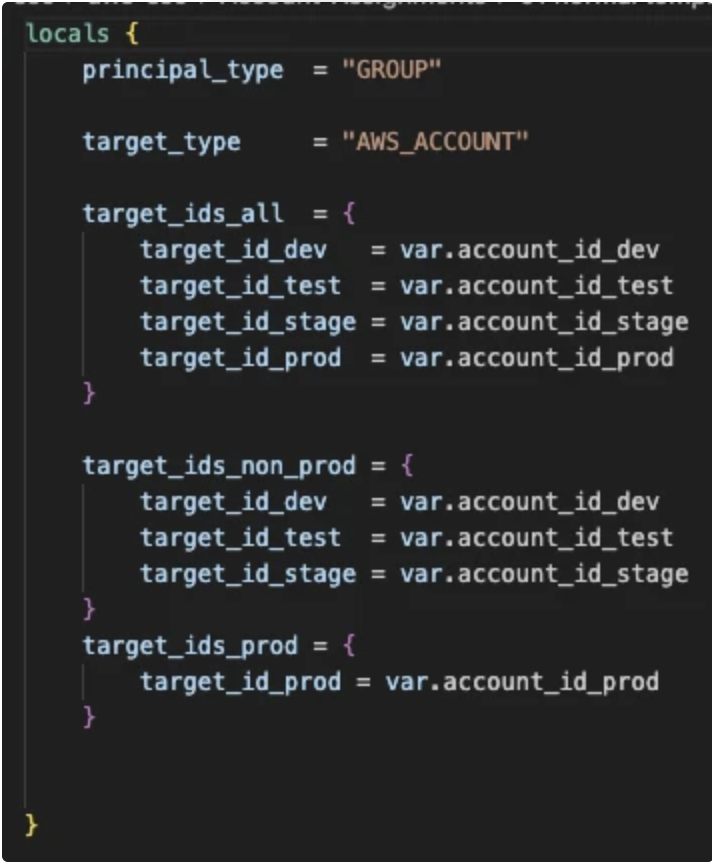
- Push your branch to the repo. If the pipeline runs cleanly, merge the branch into main and run the deploy job at the end of the pipeline.
Step 4 — Enabling network traffic
Introduction
This step configures network routing for the new accounts.
Procedure
When AFT provisions a new account it builds the standard VPC and subnet setup and creates a Transit Gateway attachment. This attachment is ready to handle traffic between AWS accounts and North/South traffic to on-prem, but it does not work until you associate and propagate the new account's addresses to the correct routing tables.
- Access each new account from the AWS Console and find the name of its Transit Gateway attachment. Record the details in a table:
| Account name | Account no | TGW attachment ID | Updated in network account |
|---|---|---|---|
| Business-Rules-Dev | 538712951480 | tgw-attach-0e4e149b07d62ce8d |
- Access the Network account from the AWS Console and add the following tags to each TGW attachment. Update your table as you go so you know what remains.
| Key | Value |
|---|---|
| Name | [Account Name]-[Environment] |
| Network | Non-Prod or Prod |
- In GitLab, open the Network account repository and run the pipeline. This updates the route tables in the network account.
Step 5 — Database firewall rules
Introduction
This step adds GitLab-to-database firewall rules for the new accounts.
Procedure
-
Clone the GitLab repo, create a branch, and open the
ew-runners.tffile. -
Add a new rule block for each set of accounts you are creating:
stateful_rule {
  action = "PASS"
  header {
    destination      = "[10.246.28.0/27,10.246.24.0/27,10.230.128.0/27]" # Payments Dev, Test, SIT
    destination_port = "5432"
    direction        = "ANY"
    protocol         = "TCP"
    source           = "10.224.10.0/24"
    source_port      = "ANY"
  }
  rule_option {
    keyword  = "msg"
    settings = ["\"Allow Primary Care Runner to Payments DBs\""]
  }
  rule_option {
    keyword  = "sid"
    settings = ["249"]
  }
}
-
Replace the destination addresses with the database subnets of the new accounts.
-
Set the source CIDR to match the runner for the relevant area:
| Runner | CIDR |
|---|---|
| Primary Care | 10.224.10.0/24 |
| NIHR | 10.224.20.0/23 |
| Platform | 10.224.18.0/23 |
| DDaT | 10.224.8.0/24 |
| Citizen | 10.224.6.0/24 |
| Workforce | 10.224.16.0/24 |
-
Update the
msgsettings to name the runner and the accounts the traffic is going to. -
Update the
sidsettings to the next number in the sequence, for example change249to250. -
Push your branch to the repo. If the pipeline runs cleanly, merge the branch into main and run the deploy job at the end of the pipeline.
Step 6 — Power user and admin roles
Introduction
This step deploys two IAM roles to the new accounts. Run this step after SSO permissions are in place.
Procedure
Two roles need installing in every new account:
NHSBSA_SSO_Assumable_Power_User_RoleNHSBSA_SSO_Assumable_Admin_Role
Adding NHSBSA_SSO_Assumable_Power_User_Role
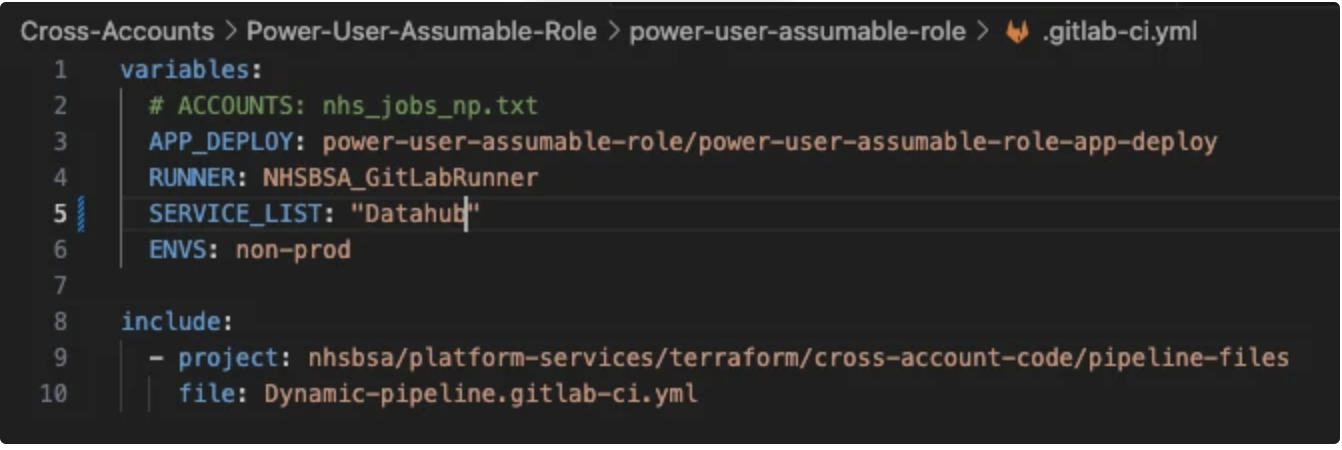
- Clone the Power User Assumable Role repo. In
.gitlab-ci.yml, setSERVICE_LISTto include only the service name part of the AWS account name, and setENVSto eithernon-prodorprod:
- Commit your changes to main. The pipeline creates jobs for all accounts that match
SERVICE_LIST:


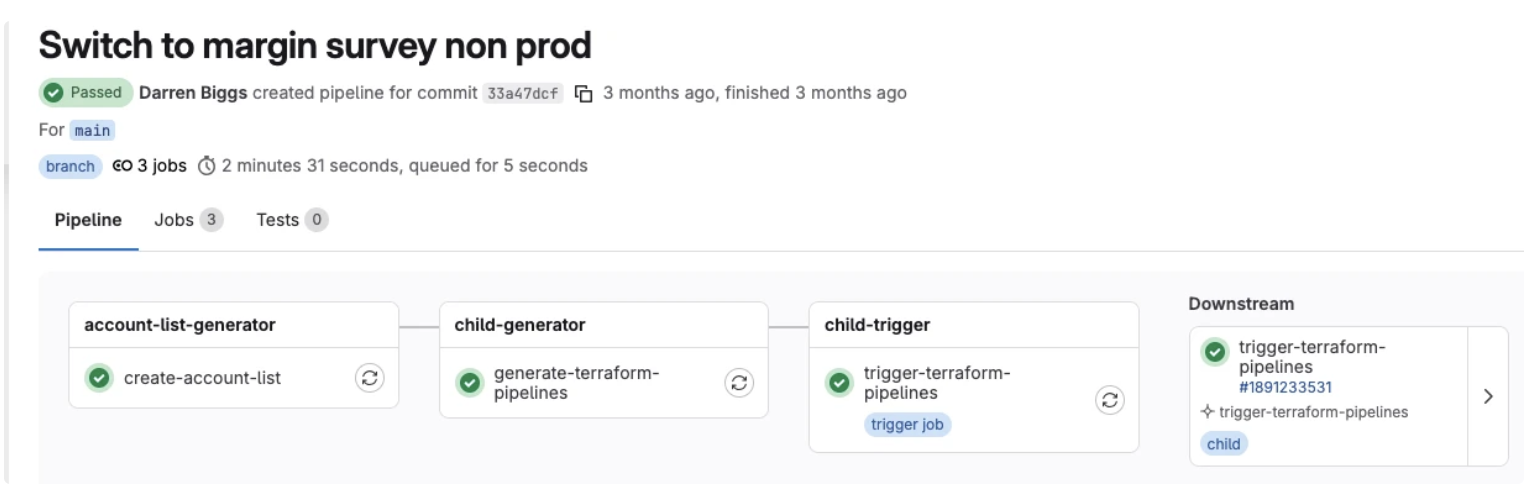
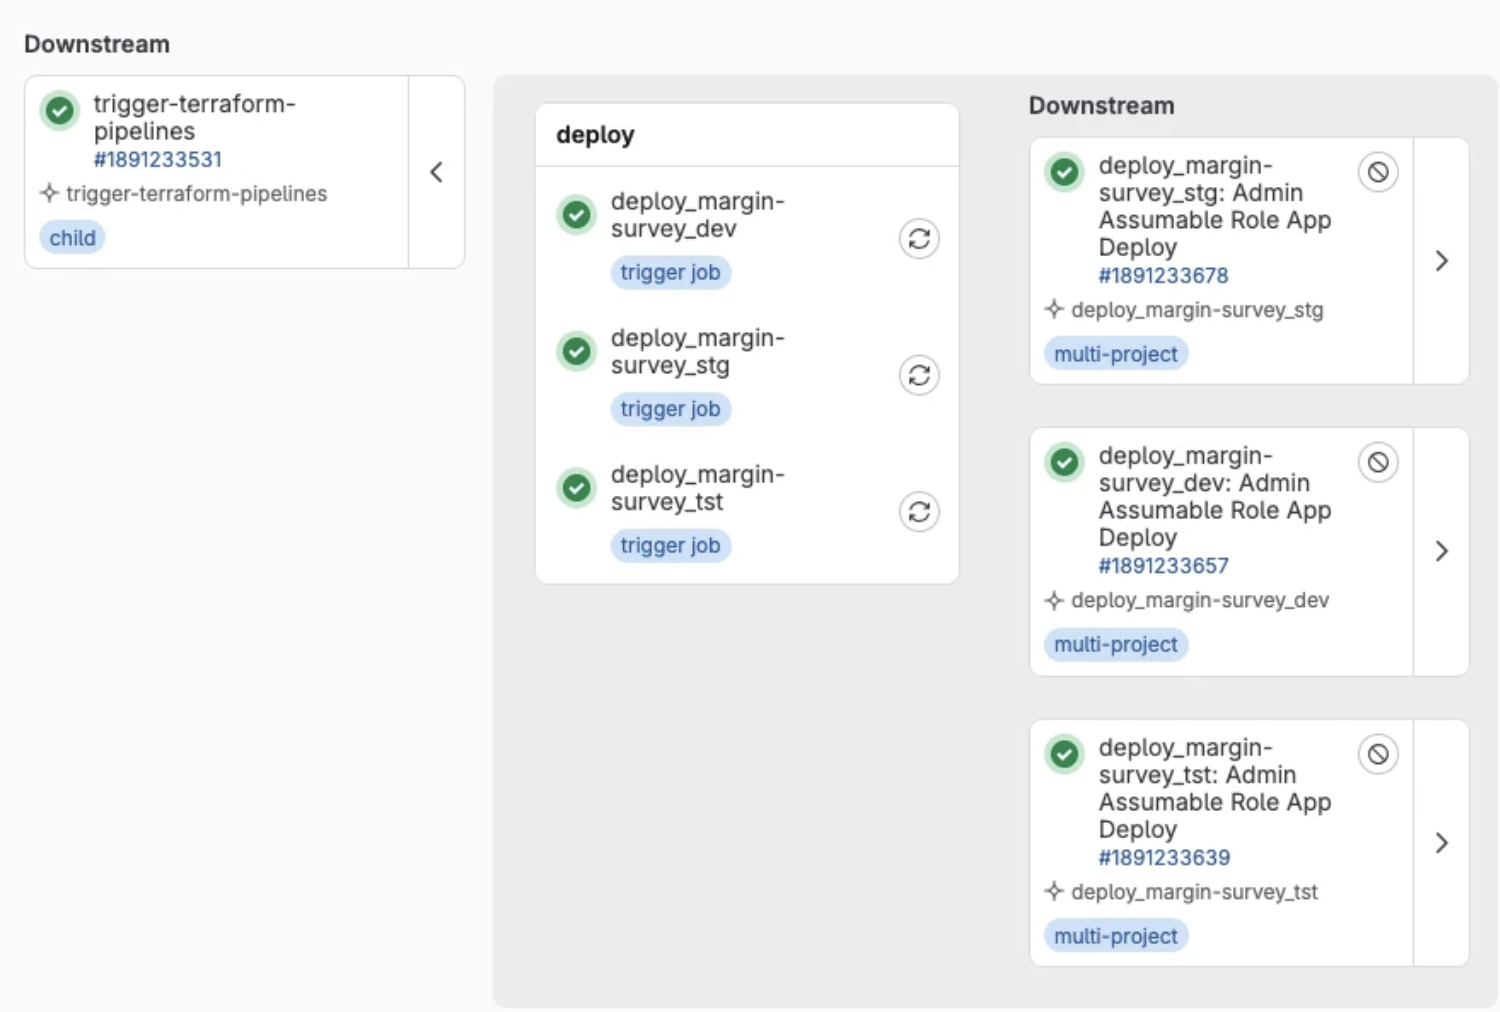
- All jobs up to and including build run automatically. Trigger the deploy jobs once they complete. Update the Additional Roles Deployment Sheet when done.
Adding NHSBSA_SSO_Assumable_Admin_Role
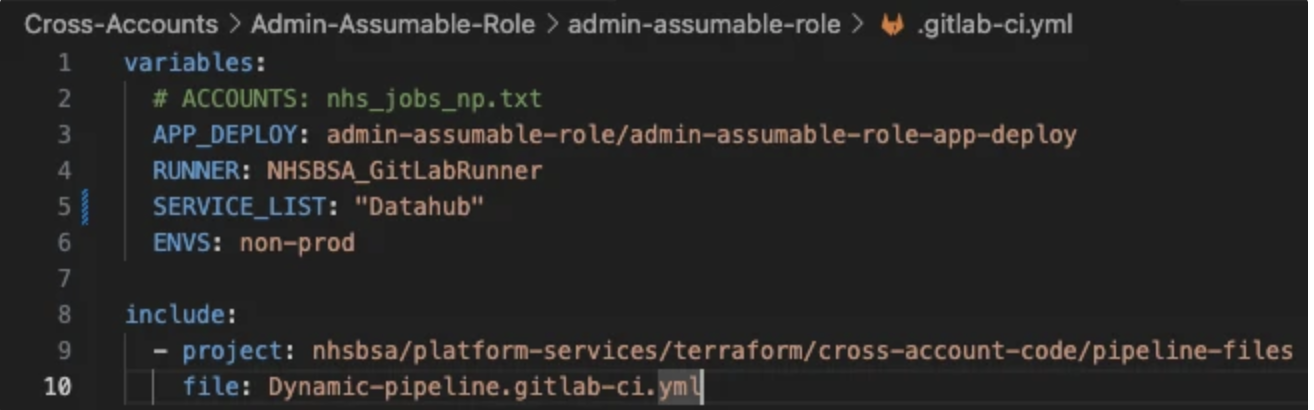
- Clone the Admin Assumable Role repo. In
.gitlab-ci.yml, setSERVICE_LISTandENVSin the same way:
- Commit your changes to main. The pipeline creates jobs for all accounts that match
SERVICE_LIST:
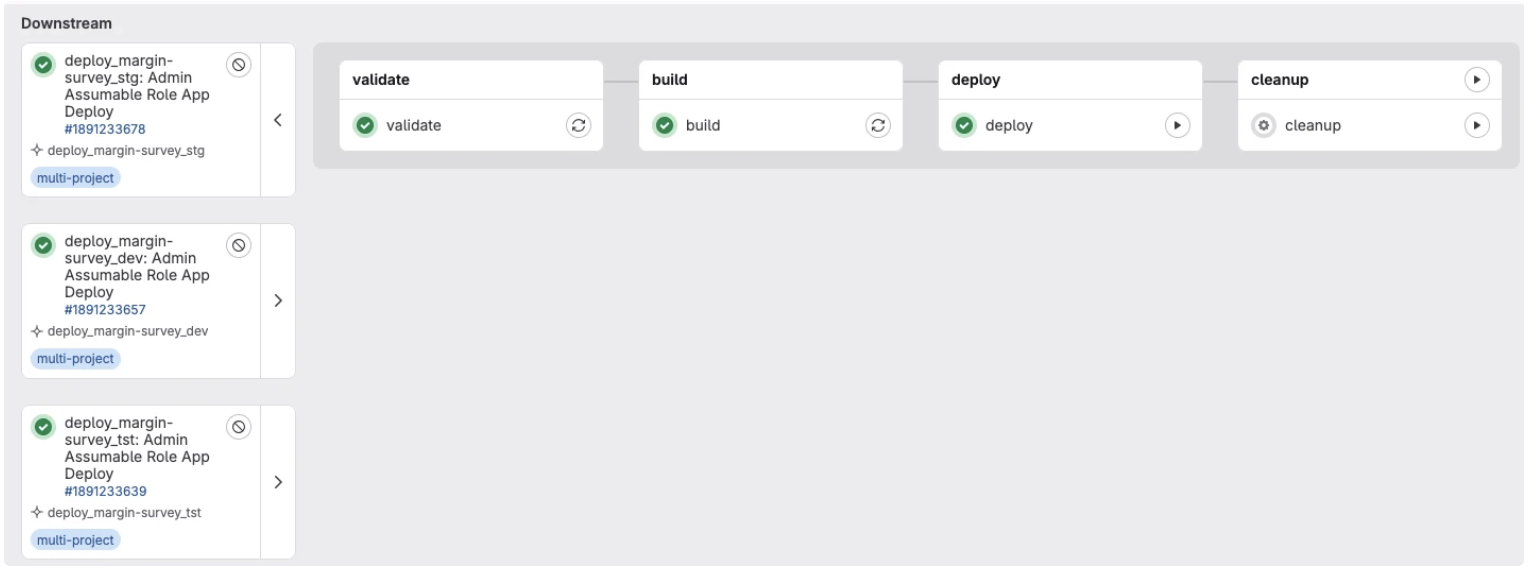
- All jobs up to and including build run automatically. Trigger the deploy jobs once they complete.